Thursday, March 31, 2011

lean, green cheesey soup tureen!

ok, i know i've been posting an awful lot of sweets lately.  can you blame me?  but i don't want to give the wrong impression.  i love veggies, too!  and there's plenty of reasons for you to love them, too.  here's just one:


creamy, cheesey broccoli soup with parsnips + spinach = last night's dinner!  this started out as a mission to clean out the fridge and ended up being a hit.  i'll definitely be including this in the regular dinner rotation from here on out.  what's great is despite it being really rich and cheesey tasting, no cheese was actually harmed in the making of this soup.  i ended up using nutritional yeast for this again (an ingredient which i'm kind of in love with) which loaded it with both flavor and healthy vitamins and nutrients without all the high calories and saturated fat of cheese.  as a matter of fact, i checked the estimated stats on my recipe and compared them to a lot of other typical broccoli cheddar soup write ups and man-oh-man....not only were my servings larger, but my calories were lower, my nutrition was through the roof, and the fat content was seriously 1/8 of the others...and those were the healthier ones!  now, while this soup definitely does have a really pleasant cheesey flavor, i can't guarantee it will taste exactly like cheddar, because let's face it, it's not made with it.  but on the other hand, neither are a lot of the commercial varieties...and they're chock full of bad-for-you stuff.  it's just a matter of what you'd like to put in your body.  i always try to veer towards something i can enjoy and feel good about enjoying.  give it a shot and see what you think!

creamy broccoli better than cheddar soup with parsnips and spinach

makes about 4 servings

  • 1 medium head of broccoli with stalk, chopped
  • 3-4 medium parsnips, chopped
  • about 2 cups of fresh spinach
  • 1 medium onion, diced
  • 1 can broth (i used light chicken broth, but veggie would work, too)
  • 1 7oz container of 2% or full fat greek yogurt (don't use fat free.  it separates when you cook it)
  • 1 ts paprika (optional)
  • 2 T garlic powder
  • 1 ts dried basil
  • 1 1/2 ts sea salt
  • 4 T nutritional yeast
  • 1 T dijon mustard
in a pot, heat a little olive oil on medium low heat.  throw in the onion and parsnips and cook until onion starts to turn translucent.  pour in your broth and turn heat up a bit to bring to a simmer.  add paprika, salt, basil, garlic powder, and broccoli.  make sure all the veggies are at least partially submerged, cover and simmer for about 10-15 minutes, or until parsnips are soft.  stir in spinach and simmer until wilted and dark.  ladle out all your veggies into your blender or food processor, leaving the liquid in the pot on low heat.  blend until smooth and creamy.  pour the pretty green porridge back into the pot and mix in yogurt, dijon mustard, and nutritional yeast.  adjust the spices to your taste.

we ate this with some cooked ground turkey meat, but it's also really yummy on it's own.  andouille sausage would be amazing on it or, for some veggie options, you could also add some smoked tofu or seitan.  top it with shredded carrots and walnuts for something different or throw in some chunks of roasted veggies and potatoes.  this soup is mild and classic enough to really go with a lot of different flavors.  play around with it!  i fully endorse kitchen tomfoolery and table antics.

alright, kids...i'm signing off for now.  but don't worry, i'll be back with more cakes tomorrow.  that's just how i roll: sweet and fluffy.  word.

Tuesday, March 29, 2011

microwave apple chestnut oatmeal bake

i'm really loving these single serving microwave baked goods.  here's another really tasty, quick and easy addition i came up with this morning.


fresh and hot out of the microwave.  cakey, dense, mildly buttery and mapley.


topped off with melting earth balance buttery spread and drippy warm honey.  mmmm. 

these were almost like consistency of a thick, soft oatmeal cookie meets a warm, bready muffin.  in other words, they were crazy good.  dense and chewy with warm cooked pieces of apple and buttery, mapley chestnut flavor.  so quick and easy, too.  i'm talking breakfast in minutes, guys.  it's legit.  see for yourself!

microwave apple chestnut oatmeal bake

makes one serving

  • about 1.5 oz soft tofu (about half of a normal "serving size" on most blocks of tofu)
  • 1/2 banana
  • about 1/4 cup chestnuts (around 8 whole chestnuts or so, preshelled and precooked and all that.  a lot of markets have them available ready to eat in jars)
  • 1 eggwhite
  • 1/4 ts baking powder
  • 2 ts flaxmeal
  • 1/4 ts fenugreek
  • dash of nutmeg
  • 1/4 ts stevia (optional if you'd like something more like a muffin and less like a breakfast bread)
  • 1/4 fresh apple finely chopped
  • 1 T rolled oats or quick oats
throw all ingredients except the apple and oats into your blender/food processor and blend until smooth.  pour into a bowl and mix in the little, bitty apple chunks and oats.  pour batter into a microwave safe container/tupperware/ramekin/bowl that has been lightly greased or sprayed with cooking spray.  cover with a paper towel and microwave for about 2.5-3 minutes or until cooked all the way through.  top with whatever you'd like!  i was definitely a big fan of the buttery spread with honey...but, fruit preserves, apple butter, or maple syrup would be amazing on this as well...as would nut butter, raisins and cinnamon.  oh so many options, oh so many breakfasts to come.

goodnight, everyone!

Monday, March 28, 2011

sunday, monday, pancake days!

for the past few weeks my schedule has worked out as such that mondays have kind of been my sundays before going back to work for the week.  when i was little, sunday was always pancake day.  i used to love waking up to the sound of hissing butter and the scraping of the metal spatula against our cast iron skillet as my mom would cook up heaping stacks for my sister and i to devour.  however glorious it may have been, it was always sad to see them quarantined to one single day each week.  yes.  i love me some pancakes.  i'd love them all the time if i could.  so i've made it my personal mission to develop a tasty breed that loves me right back.

check it out: yummy pancakes...packed with protein, fiber, and nutrients, gluten free, using minimal grains/flour.  really satisfying, really awesome, really healthy b-fast!  protein often ends up being what my body needs most to get me moving in the mornings, and these guys definitely deliver.  they're made using 1/2 can of kidney beans, and if that sounds freaky to you, never fear.  you'd honestly never know it...what with all their cakey characteristics...and even if you did know it (perhaps because you made them using a certain recipe from a certain blog...ahem) i dare say you wouldn't even care!  they taste like pancakes, man!  who isn't into that?
now, i've made these a few times trying out different variations, and i think i can safely say i'm giving you the best, most successful recipe in the history of these beany little imposters.  this particular recipe uses buckwheat flour (which i grind myself using raw buckwheat groats in my little coffee grinder...that's just what i like best, but you could try commercial varieties as well) but i've also tried to make them using quinoa flour, and even tried to go completely flourless in the past...using only flaxmeal.  both alternate methods made for some really tricky (read: endlessly frustrating) pancake making due to the nature of both of the ingredients.  quinoa flour is just too fragile for this recipe without some serious tinkering...i was able to make the pancakes using it, but not without a lot of sticking to the pan and tearing when i tried to flip them.  flaxmeal just ended up being a nightmare to work with.  the cakes just wouldn't stay together...even as they were cooking in the pan.  the consistency was just all off.  really, i'd say buckwheat is your best bet...or if you'd like, i'm sure you could just substitute wheat flour, too.  i've thrown fresh blueberries in as well and that came out really tasty, but you do have to take some precaution if you go that route since the extra moisture can make the pancakes a little more fragile when you're flipping them.
here's the low down:

beanie buckwheat protein pancakes
(or: just cause it sounds healthy, doesn't mean it tastes bad :D)

makes about 4 pancakes (2 servings for me)

  • 1/2 can red kidney beans
  • 1 T raw buckwheat flour
  • 1 T flaxmeal
  • 1/4 cup soy (or any) milk
  • 2 egg whites
  • 1 T light shredded coconut
  • 1 ts vanilla extract
  • 1/4 ts stevia
  • 1/2 ts cinnamon
  • 1 ts baking powder

throw all ingredients in your blender/food processor and blend until smooth.  cook them just like you would normal pancakes: spoon a few tablespoons into a greased or oiled skillet/pan over medium low heat and cook until the top starts to get bubbly and puffy.  gently flip with a spatula and cook until the middle is cakey.  mom would be proud :)

a few creamy topping options
 (or: guess how much i love you :D)

if you wanna keep it simple, you could top these off with maple syrup like the real mccoy, or use fresh fruit, honey, fruit preserves, melted peanut butter, etc.  the first time i made these i piled them high with cashew cream which was divine:


cashew cream is one of my favorite treats.  it's absurdly easy to make, too.  it just takes a little foresight and a tiny bit of prepwork.  for a single serving, i'll generally use about 1/3 cup raw cashews.  cover them with water and soak them over night (or at least for a few hours) to soften them up.  when you're ready to make your cream, just drain the water, throw the cashews in your blender with a little splash of soy milk or water and about 1/4 ts of vanilla and blend on low until smooth.  voila.  deliciousity.  if you want to make more cream, just up the amount of cashews.  you can make the cream as thick or as thin as you'd like...just add more or less soy milk or water.  i generally like mine almost like whipped cream, so i'll only add a splash at a time to get it to the right consistency.

but wait, there's more!  lately, i've been really into tofu whip...especially as a topping for these.  this is just as easy, if not more so, since it requires no prep work beforehand.  i just throw about 3 oz (about 1/5 block) of soft tofu into the blender with 1 1/2 T honey and a little dash of cinnamon and blend until smooth, adding a teenie bit of soy if needed.  you could use maple syrup or agave as well...i just really like honey.

now go get in the kitchen and bust out the skillet!  pancake day is officially not just sundays anymore!
 ...just don't tell mom ;)

Sunday, March 27, 2011

quinoa flour power! or the little pink cake that could

being a really active, health conscious person, i tend to try not to eat massive amounts of complex carbohydrates in the form of breads and grains...opting instead to get a lot of my carbs from fruits and veggies for a good amount of my meals.  these tend to be much easier for your body to break down, and also, having been unprocessed, contain a high amount of nutrients undisturbed from the refining process.  as i'm sure you've noticed, i definitely still eat grains, often in the form of adorable little dessert-meals, but i generally try to keep my grain intake to one serving a day...and usually try to aim to eat it about an hour after exercising for best absorption of nutrition and energy while still allowing my body some time to burn off stored fat immediately after a good workout.  for the past few weeks i've been trying out different flour alternatives with higher nutritional values than wheat...because while wheat is tasty, there are definitely much more nutritious (and often really delicious) alternatives that can open doors to a lot of really interesting recipe and flavor options as well.  fun fun!  what's cool about a lot of these other types of flours is that they often end up being gluten free, which means that recipes incorporating them are generally celiac and wheat allergy friendly.  thankfully, i don't harbor either of those dietary issues (as far as i know *knock on wood*), but i do really like to keep my palate diverse and my nutrition high while enjoying my food.  for a while now, i've been intensely interested in trying to incorporate quinoa flour into my grain based foods, because of it's incredible nutrition content (unlike most plant based ingredients, quinoa contains all 9 essential amino acids to make it a complete protein on its own...which is awesome in and of itself, but it's also super high in fiber, rich in antioxidants, lower in carbs than wheat, and contains healthy fats) and also because i just love the taste of quinoa.  however, my past several attempts at using the flour were all pretty tragic.  my baked goods kept coming out tasting bitter and grassy.  the yummy, nutty flavor that i came to know and love quinoa for was totally missing and my mouth was sad and angry each time i ate my treats.  so many poor wasted cakes.  it was a dark, dark time.  until one fateful night...
i'd been trying to come up with some way around the predicament.  should i wash and toast the grain?  somehow cook it and dry it again before grinding it?  all over the internet i was finding articles and comments by people with similar problems with quinoa flour making their baked goods taste wonky, but it wasn't until i found this article that i was presented with a really basic, simple, and definitive solution: all you have to do is heat treat it.  hurray!  it turns out that quinoa is naturally coated with these really bitter tasting stuffs called saponins that act as a barrier against the sun and as a natural defense against insects.  the grain itself tastes amazing, but the saponins coating it taste awful.  this is the reason why you often need to soak and rinse quinoa repeatedly before cooking it to help with the dissolving of this bitter, nasty business to get down to the delicious, nubby grain.  when using ground quinoa as a flour, the saponins can be broken down really easily in a conventional oven with very little work involved.  all you need to do is preheat your oven to 215-250, grind your quinoa (i've just been making small batches using raw quinoa in my coffee grinder) and spread it out over a baking sheet so it's no more than 1/4" high at any one part, and heat it in the oven for 1.5 to 2 hours (depending on your temp...i've been doing about 1.5 hours at 250 and that's been working out very nicely).  once the time is up, just remove the pan, let the flour cool, and carefully pour it into a bag or container for storage.  that's it.  no crazy toasting or roasting or even any supervision, really.  i typically grind my flour, put it in the oven, eat my breakfast, drink my coffee, do my daily workout, and by the time i'm all finished, so is my flour.  it ends up tasting amazing...lightly toasty and a little bit nutty.  and despite being gluten free and therefor producing only unleavened baked goods, it still manages to take on a really light, spongy consistency that retains moisture like a really awesome, high class muffin.  now, i know i've been having a lot of fun with grinding my own flour and all, but if you'd like to try to save a little time, but still want to try out this awesome ingredient, there are commercial varieties of quinoa flour available to buy (bob's red mill, for example, never disappoints), but i can't vouch for their flavor.  based on what i've read, these commercial varieties often need to be heat cured as well to fully eliminate any trace remains of saponins, but who knows.  even if they do, it's so worth the extra little step.  if only so you get to try these little sweethearts:


quick, easy, light, and oh so pretty.  this is my favorite meal cake, yet.  and hey, you can make it in the microwave!!  high five!
now, i've made this cake twice.  once, using some leftover strawberry cream from thursday's post, and once using just fresh strawberries and yogurt (a little easier if you don't have the strawberry cream stuff on hand) with a few other minor variations.  i'm including both recipe options so you can try either variety and see what you like or what you find easiest.  both were amazing.

microwave strawberry quinoa cake

makes one serving

wet ingredients:
  • 1/3 cup strawberry yogurt cream OR 1/4 cup sliced fresh strawberries coarsely blended with 1 T greek yogurt (leaving little chunks of fruit is ok if not awesome.  i've even just chopped the berries really, really finely by hand and crushed them with the flat of the blade and then kind of mashed it together with the yogurt using a fork on lazier days when i don't feel like using the blender.  either way works, but doing it by hand will definitely leave you with larger strawberry pieces in your cake)
  • 1 egg white (or a flax egg if you'd like to keep it vegan: 1 T flaxmeal mixed with 2 1/2 T water and allowed to sit for 5 minutes)
  • 1 1/2 ts vanilla extract
  • 1 T agave
  • 1 T soy (or any) milk
dry ingredients:

  • 1/4 cup heat cured quinoa flour
  • 2 ts rolled oats or quick oats OR if you'd like a little bit of a light crunch texture in your cake (kind of like a really nice hearty grain bread) you can use 1 ts raw quinoa with 1 ts raw buckwheat groats
  • 2 ts flaxmeal
  • heaping 1/4 ts baking powder
  • 1/4 ts stevia
  • 1 T light shredded coconut

whisk all the wet ingredients together in a bowl.  add each dry ingredient one at a time, mixing after adding each one to ensure it's all evenly combined.  pour mixture into a lightly greased or cooking sprayed microwave safe tupperware, bowl, container, or to make minis (or a tall layered cake) divide into two ramekins.  cover with a paper towel and microwave for about 2 minutes.  let cool for a minute and flip out onto a plate.  voila!


a strawberry newborn fresh out of the microwave.  warm, spongy, and just a little pink!
and now, toppings!  for the first time around, i used up the last of the strawberry cream, a handful of raw cashews, and a little coconut for a creamy, satisfying and very pastel little lunch


loved the cashews on this especially...mmm

for the second time, i made 2 mini cakes in my ceramic ramekins and made a fun personal sized layer cake using some banana yogurt icing (just mush about 1/4 of a ripe banana with a fork and mix in about 1 T yogurt...you can add a tiny bit of sweetener and vanilla if you'd like...but it doesn't absolutely need it) some fresh strawberries and a little dusting of coconut

bright berries peeking out..

so there you have it, guys.  my many adventures in quinoa flour...come to a very sweet, very satsifying, very pink conclusion.  i will definitely be making more versions of this little cake in the future.  so quick, so easy, and so so yummy.  the moist texture along with the light toasty flavor in this are just all too well suited for breakfast cakes and muffins.  a coffee cake idea has been brewing in my head for a while now, so expect to see something along those lines pretty soon.  in the mean time, let me know what you think of these and what your thoughts are on quinoa flour.  i'm definitely hooked...these suckers were a game changer.  enjoy!

Thursday, March 24, 2011

super easy vegan cocoa hurray-souffle!

So i promised myself i'd keep this post short and sweet tonight, since i've been feeling the fatigue all day...but there was just something i had to share before getting started on a serious lounging session.  let me just get straight to the point:


this little dream boat was my breakfast this morning.  although you might not have recognized that charming face underneath this gorgeous little guise:


couple of stone cold foxes aren't they?  so easy to make, too.  and healthy, healthy, healthy!  chock full of protein and not a speck of added sugar.  and you know what's crazy?  one of the main ingredients is beans...but it's not like anybody needs to know about that.  they certainly wouldn't guess it by the look, taste, or sheer decadence of these custardy, cakey little heart throbs.  but hey, nothing wrong with a little stealthy health food hidden in your cake, right?  your secret is safe with me.  now go make these puppies!

vegan cocoa souffle

makes 2 little souffles (ALSO!  see the updated version at the bottom of the page for what i consider an even better, richer, crazier version)

  • 1/2 very ripe banana
  • packed 1/3 cup pitted dates
  • about 3 oz of soft tofu (equals out to about 1/5 a block of nasoya brand tofu or probably most other tofu)
  • 1/2 cup garbanzo beans
  • 1/3 cup soy (or any) milk
  • 1 1/2 ts vanilla extract
  • 2-3 T unsweetened cocoa powder depending on how chocolatey you'd like it.  i'd say go heavy, but you might be the modest type.  see what you like!
  • 1/4 ts stevia or a little more to taste (you could use other sweetener as well, but you'd probably need more since stevia is sweet to the extreme)
  • 1/4 ts baking powder
  • unsweetened carob chips or chocolate chips for layering

preheat your oven for 350.  soften the dates in the microwave by covering with water and microwaving for about a minute or so or until nice and tender.  drain the water off and throw in your blender or food processor with all the other ingredients except for the carob chips.  blend until smooth, scraping the sides as needed.  put a few spoonfuls into 2 ramekins or muffin cubbies sprayed with cooking spray or lightly greased if not non stick.  cover with a layer of carob or chocolate chips and spoon the rest of the custard over top.  top with a few more carob/chocolate chips and pop them in the oven on the middle rack.  bake for about 30 minutes or until the tops are starting to crack


let them cool for about 10 minutes or so.  eat them plain or add toppings and/or creamy stuff.  i did a little of both and made some strawberry yogurt cream, which was really easy, light, fruity, and delicious.  it made a really good amount, too, so i had a little left over to play around with for possible other recipes later (dun dun duuunnn!  foreshadowing!!)

strawberry yogurt cream

  • 1/2 very ripe banana
  • heaping 1/2 cup chopped fresh strawberries
  • 1 T greek yogurt
  • about 1/2 inch slice (maybe 1.5 oz?) of soft tofu
  • 1 ts vanilla extract
  • 1 T light shredded coconut
throw into blender/food processor and blend until smooth.  slather on top of souffle and throw on a few whole pieces of strawberry if you'd like


gah....sometimes i hate making these posts at night because they start making me hungry.  oh, the torment of eating well!  you really need to try these out.  they're adorable, easy, just the right amount of sweet, and the texture is just so awesome.  a perfect combination between warm custard and dense chocolate cake.  i might did (see updated version at bottom of the page) toy around with the amount of dates and baking powder to try for something a little more puffed up and fudgy next time, but these really didn't disappoint as is.  i mean, look!


let's see that again....this time, more enticing!  bring on the creaminess!


oh.  yes.

there you have it.  short. sweet.  easy.  healthy.  amazing.  i will definitely be making these again....probably within the next 12 hours to be exact.  sweet, sweet dreams everyone!

**update!**

so, i tinkered around with a few things in the recipe this morning and made what i think is a way more superior version of this little guy.  don't get me wrong, it was awesome to start with, but i think these few changes really made the difference in bringing this over the top.

modifications:

  • upped the amount of dates to 1/2 cup
  • doubled the amount of baking powder to make it 1/2 ts
  • definitely, definitely reccommend using 3 T cocoa instead of 2.  soooo rich and fudgeyy.  gahhh

the extra dates in this made the souffle taste much richer and enhanced the cocoa fudginess and the extra baking powder really helped it to puff up a bit more.  i ended up needing to bake it for an extra 10 minutes or so because of the added dates, but it was seriously worth the extra little wait time.  so rich and creamy and amazing.

Wednesday, March 23, 2011

cheese and thank you: a healthier, dairy free way to get your cheese fix

ugh.  what a day.  snow, slush, rain, and temperatures just barely above freezing since the crack of dawn this morning.  mother nature, i gotta say, it's a little early for an april fool's joke, and definitely a lot late for this kind of wintry mixology.  so far, this first week of spring has felt an awful lot like the first week of winter.  bleh!  on days like today, all i want is sunshine...but since that's not an option, i'll definitely settle for comfy jammies, silly movies, and a giant bowl of rich, melty comfort food.  something along these lines, perhaps?

thick, creamy, cheerful, delicious

roasted veggies with cheeseless cheesey sauce

there really isn't any cheese in this, but thanks to the flavor from the nutritional yeast and spices, the lovely golden color from the sweet potato, and the yummy creamy texture, you'll almost be fooled into thinking there is.  this sauce just happens to be way better for you, though.  it's low in calories, loaded with veggies, vitamins, protein, and nutrients, and it's very low in fat, unlike it's sloppy, saturated cheddar-cheesey counterpart.  i still love cheese.  a lot.  an awful lot.  but i'm not so huge on it's nutritional write-up a lot of times, so i tend to chow down on it really sparingly.  i still get cheesey cravings, though...in a big way.  so i've been on the hunt for something more health appropriate for a while now.  so, using kathy's amazing vegan cheesey pasta recipe as inspiration, i came up with my own version of this awesome entree.  this ending up making a LOT of sauce, which could easily stand alone as a really yummy, creamy soup as well.  i was left with a lot of leftovers after stuffing myself and nick, and i plan to eat the rest as soup and sauce for the next few days.  hurray for cooking in bulk!

i ended up serving mine over a nice big helping of roasted veggies for this go around, but this would be really amazing with pasta, rice, or quinoa as well.  to make roasted veggies, just preheat your oven to 400, choose your vegetables (i used cauliflower, 2 small onions,  baby carrots, brussel sprouts, mushrooms, and a few sliced cloves of garlic this time) wash them, cut into bite sized chunks, and toss them with olive oil, sea salt and spices (rosemary and basil are two of my favorites for roasted veggies).  lay them out in a single layer on a foil lined baking sheet and roast for about 30 minutes, stirring every 10-15 minutes to make sure they roast evenly.  different veggies cook at different speeds so monitor them as they cook to make sure they're all tender before you decide that they're finished.  while these are cooking, you can work on getting your sauce ready.
you will need:

  • 1 smallish onion cut into pieces
  • 1 large parsnip or 2 small ones cut into chunks
  • 1 very large sweet potato or 2 small to medium sized ones cut into large chunks
  • about 1/4 head of cauliflower cut into chunks
  • 1 can of broth (i used low fat chicken broth, but veggie or even coconut milk would work as well)
  • 1 1/2 ts sea salt
  • 1 ts dried basil
  • 2 T garlic powder
  • 2 T light shredded coconut
  • 6-7 T nutritional yeast
  • 1 T dijon mustard
  • 7 oz of 2% or whole fat greek yogurt (don't use fat free.  it separates into a weird mealy mess when you cook it) *OR* if you want to keep it vegan/dairy free you can use vegan sour cream or just omit this entirely for a slightly less thick/creamy sauce with a little less tang

heat a pot over medium low heat.  throw in onion, parsnips, and sweet potato with a bit of olive oil and cook until onion starts to turn translucent.  add cauliflower and broth and turn heat up to medium.  make sure all the veggies are at least partially covered in broth and add a little soy milk or water if you need to.  bring to a simmer and add the salt, basil, garlic powder, coconut, and nutritional yeast.  cover, and cook until all the veggies are tender, stirring occassionally...generally about 15 minutes or so.  ladle out all the large veggie chunks into a blender or food processor leaving the broth behind and blend until smooth.  return the creamy sauce-soup mixture to the pot and mix in mustard and greek yogurt.  stir until it's all consistent, smooth and evenly heated, adjusting the spices if needed.  pile garlicky roasted veggies onto your plate, cover with amazing creamy sauce, sprinkle with a little paprika if you'd like, and just try not to devour this with a spoon in both hands.  it's that yummy.


mmmm.....cheesey, easy, tummy pleasey.  enjoy, guys!  this sauce is about as deceptively cheesey as this spring has been deceptively wintery.  guilt free, but you'd never know it.  hurrah!

Monday, March 21, 2011

straight out the oven lovin'

i woke up from a deep food coma this morning after having voraciously stuffed myself at angelica kitchen last night.  if you've never been here or heard of this wonderful place before, you should really make it a priority to get your eat on at this adorable little vegan restaurant in the east village.  the food is always seasonal, organic, really fresh, vegan, and incredibly creative.  not to mention ohhh so delicious...and health conscious, too!  hurray!  needless to say, i end up having a hard time saying no to anything on the menu, especially when the dessert edition rolls around.  generally at this point in the meal, i'm beyond satiated (stuffed to the gills is more like it), but the sheer awesomeness of the precursing courses makes it really hard to pass up another flavor check.  i've never been disappointed.  in the past, i'd tried out a spiced bread pudding of theirs and have since been inspired to create my own healthy, vegan friendly version of the classic treat.  this morning, after fumbling out of bed to a lazy, rainy day...still a little high and inspired from my awesome dinner experience the night before...having stumbled into the kitchen to find several bananas on the counter quietly browning themselves to death from my neglect...yes, this morning seemed like a perfect time to give some warm, vegan comfort food a shot.  and so...a star was born!


spiced banana bread pudding

makes two personal sized bread puddings

  • 1 or 2 pieces of bread, depending on how bready you'd like it (i used 1 slice of alvarado complete protein sprouted wheat bread, but you could use whatever bread you'd like)
  • 1/4 cup soy milk (or any kind of milk)
  • about 4 oz of soft tofu
  • 2 very ripe bananas
  • 1 1/2 ts vanilla extract
  • 1/2 ts cinnamon
  • dash of nutmeg
  • walnuts
  • raisins

preheat your oven to 350.  rip the bread into bite size pieces and put in a bowl.  add the milk and stir until all the pieces are covered and allow it to sit and get mushy.  throw the tofu, vanilla, cinnamon, nutmeg, and just 1 1/2 of the bananas (save 1/2 of one to use for layering in a minute) into your blender or food processor and blend until smooth, adding a splash of soy milk or water if you need it.  you can also add a little sweetener at this point if you'd like as well.  i found the pudding to be just right using only the bananas, but if you'd like something a little more desserty, some maple syrup, agave, or raw sugar would be good.  for the pudding vessels, i used 2 non stick, ceramic ramekins, but you could probably use a little sized bread pan or even some muffin tins.  just lightly spray your pudding cubby of choice with cooking spray if it's not non stick and start making some layers!  put a few pieces of bread-mush in the bottom, followed by a few spoonfuls of the tofu banana cream blend, a few slices of banana, walnut pieces and raisins.

making pudding nests...overlord owl mug oversees the operation

follow this up with an additional layer of the same, until all the ingredients are used up.  top off with a sprinkle of cinnamon and a some rolled oats if you'd like.


loosely cover the pudding with foil, kind of doming it over the top so you don't squish the pudding mixture down, put it in the oven on the middle rack and bake for 20-25 minutes.  remove the foil and cook for an additional 10 minutes or until the top is slightly firm.  let the pudding cool for at least 10 minutes so it can set a little better and so you don't scald your pretty little mouth while scarfing.  breakfast injuries = no bueno!  these, however....sooo bueno!  arriba!


soft, warm, spicy, a little cakey, moist, and (sshh!) healthy!

i'm sure i'll be experimenting with  more baked puddingy things in the near future, so keep an eye out for those.  but in the mean time, try this little guy out and see what you think!  this rainy day just got a little brighter for me.  yum, yum

Sunday, March 20, 2011

double feature saturday

so this morning i woke up to a last minute job cancellation.  at first i couldn't help but feel annoyed at the loss of an opportunity...particularly one i had been counting on.  but then i realized, hey, i have a whole day now.  a whole day.  to do.  whatever.  i want.
(!)
a walk in the park, an awesome cardio and bodyweight workout, lots of delicious food making, and mug upon mug of tasty single origin coffee drinking ensued.  hurray for impromptu days off!  especially when they start off with things like this:


...and wind down with things like this:


i'm all, why not share the goods?  so here you go, guys.  thanks to my surprise saturday downtime, we're going back to back with a proper double feature.  and just because i love pumpkin so, so much (and because i still had half a can leftover from the other day) i decided to kick things off with these yummy little pumpkin pattycakes with creamy peanut butter yogurt icing.  half pancake, half warm pie filling, all around awesome topped with creamy fluffy goodness.  booya!

breakfast pumpkin pattycake with peanut butter yogurt icing

makes one pattycake

for the pattycake:
  • 1 TS rolled oats or quick oats
  • 1 TS unsweetened shredded coconut
  • 1 TS flaxmeal
  • 1/4 cup unsweetened 100% pumpkin puree
  • 1 TS raisins
  • 1/4 apple finely diced
  • 1 ts honey or agave
  • 1/4 ts vanilla extract
  • 1/4 ts cinnamon
  • dash of nutmeg
  • pinch of sea salt


throw all your ingredients into a bowl and mix into a mushy mash of sorts.  at this point, you have a choice to make.  if you'd like something a little more on the creamy side (more like a warm custard), add a little more pumpkin or 1 TS of unsweetened applesauce to the mix.  if you'd like something a little denser and more like a desserty version of a latke in consistency, add another TS or so of oats.  or you can just try it the way it is and tweak it in the future if you'd like.  the recipe above is kind of a nice middle ground.  not too mushy, not too dense.  just keep in mind that these are not pancakes in any sort of traditional sense...they're much more like thick pie filling or an undercooked cookie in consistency: soft, warm, and delicate.  mmm.
heat a pan (nonstick definitely helps) with a little oil or cooking spray on medium low and empty the pumpkin mash into the pan.  form it into a patty with a fork and let it brown a bit on one side before carefully flipping it with a spatula and reshaping it back into patty form.  these often will come apart while you cook them.  it's just the nature of the beast.  just mush them back together with your fork or spatula and you're in good shape.  cook and reshape on either side until starting to brown


once thoroughly warmed to your liking, shovel onto a plate and get your icing ready.

for the peanut butter yogurt icing:

  • about 1/3 ripe banana
  • 1-2 ts unsweetened peanut butter
  • around 1 TS greek yogurt

break the banana into chunks.  melt the peanut butter over the banana in the microwave for up to 30 seconds.  mush them both together into a gooey jam.  mix in the greek yogurt and add a dash of cinnamon or a little touch of sweetener if you'd like.  i find that this is plenty sweet on its own from the banana, but you might like it more so.  dollop on top of your pattycake and add raisins, fruit, walnuts, or whatever you'd like!


if you'd like something a little less creamy to try with these, they're also really awesome with this honey nut streusel business, which is just as easy to make as the icing.  yay!


just take a small handful of peanuts (i think i used 1 TS or 2) with about 1 ts of sunflower seeds and grind into a coarse meal.  i just use an automatic coffee grinder that i've set aside for things like this and it works great.  just make sure you clean it out really well both before and after if you have used it for coffee in the past and/or plan to use it for coffee in the future.


empty the meal into a bowl, add 1 ts of honey, maple syrup, or agave, 1 ts of oats, a sprinkle of cinnamon and i like to add a dash of fenugreek as well.  mix it together until crumbly.  that's it!

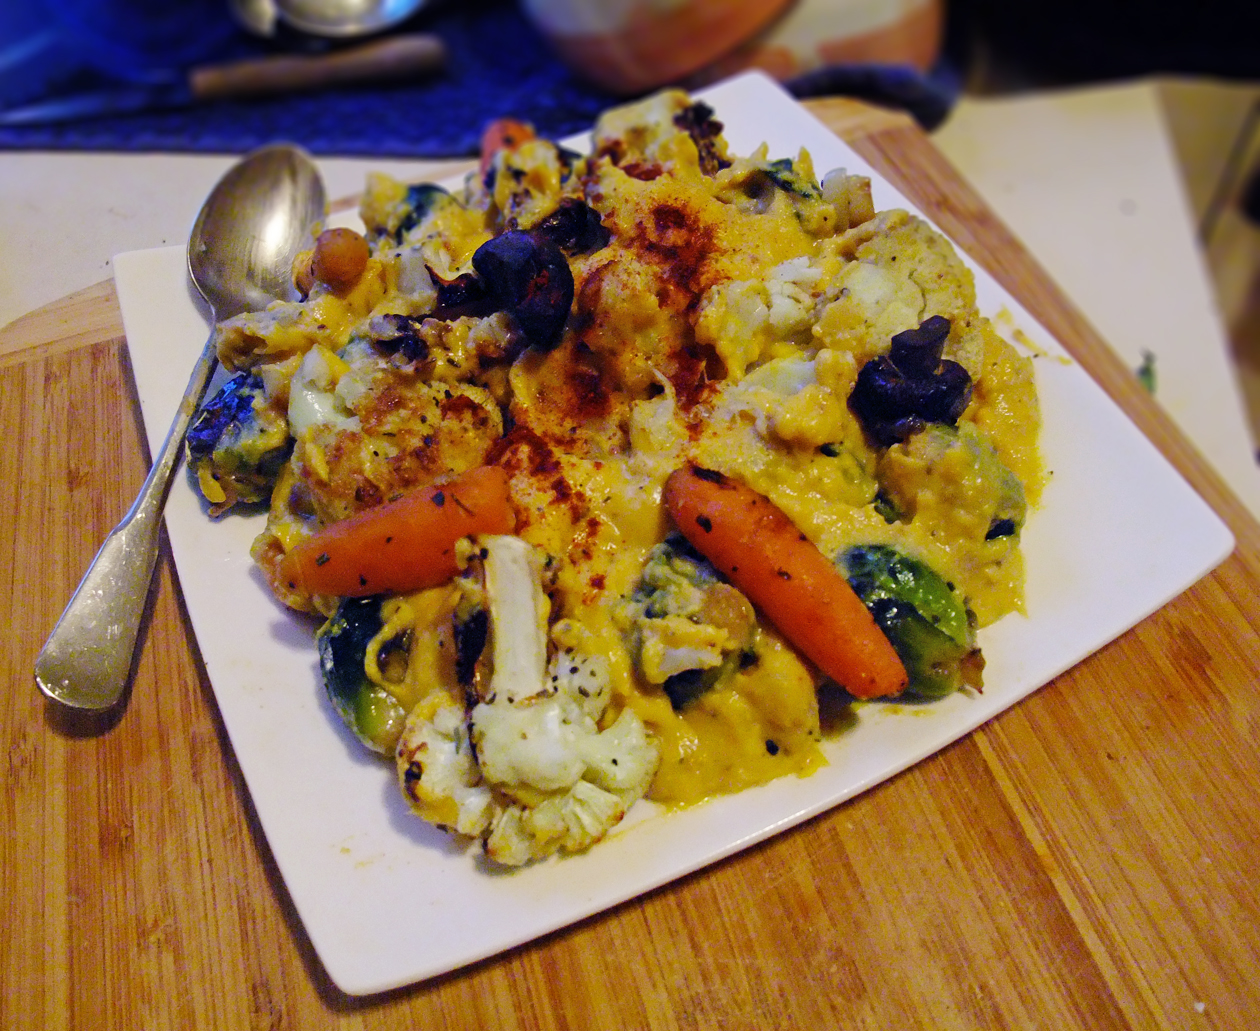
now, fast forward to dinner: italian spiced socca pizza.  i've been meaning to try this out for a while now.  i've made socca several times before in the past and experimented with different flavors and toppings and have always had really amazing outcomes.  socca pizza was an idea that practically made itself...i've really just been waiting for an opportunity to throw this bad boy together.  i'm so glad it finally all worked out tonight.  this will definitely be happening again.  i mean really, how can you go wrong with pizza?


first, i should probably explain what socca is if you don't know already.  socca (also called farinata) is a gluten free mediterranean flat bread made with garbanzo bean flour that is often served with different spices cooked into it.  i believe traditionally it's made with salt, rosemary and savory herbs, but i've made this with cocoa or used juice in place of water in the past for a lightly sweet socca and love, love, loved it.  it's texture is light, and almost like a thick crepe with a sort of creamy center because of the garbanzo bean flour.  it's incredibly diverse, crazy adaptable, really healthy, and excellent for clearing out your fridge.  there's really no end to what you can serve socca with or how you can flavor it.  it's super quick and easy too!  i've seen a lot of different recipes floating around with different proportions, temps, and cook times, but i generally follow one basic one and adapt it as i see fit.  here's what i'm currently using:

basic socca


  • 1 heaping cup garbanzo bean flour
  • 1 cup water
  • 1/2 to 1 ts sea salt
  • 1 TS olive oil
  • 1 TS unsweetened applesauce

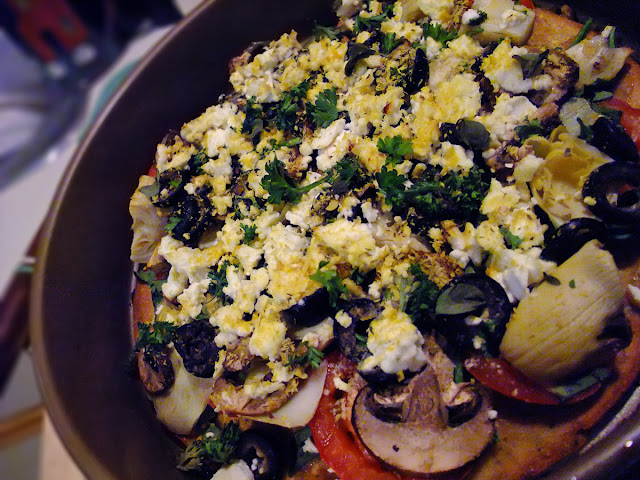
whisk all the ingredients together and pour into a 9 inch pan that's been sprayed with cooking spray or lightly greased.  bake in the oven at 375-400 for about 30 minutes or until the top is dry and starting to crackle.  you can take it out and gently flip it at this point and cook for another 10 minutes if you'd like to brown both sides, or you can just leave it on one side.  again, totally adaptable to whatever you're going for.  for this round, i added some garlic powder, rosemary, oregano, and basil to my batter before pouring it into the pan and just cooked it on one side for 30 minutes at 375.  then for the pizza parts, i just added some fresh tomato slices, mushrooms, chopped spinach, black olives, artichokes, a little fresh parsley, fat free feta, and nutritional yeast and threw it back in the oven for another 12 minutes until the tomatoes were soft and the cheese was warm.  i spread a little bit of hummus and greek yogurt on mine as i ate it, too, and that turned into a pretty fancy feast...very mediterranean and very satisfying.  this was soooo yummy and fresh tasting.  super delicious pizza without all the grease and heftiness.  hell.  yes.
all in all, i'd say this was a pretty perfect ending to what ended up being a pretty awesome day.  i hope everyone else had an awesome saturday, too!  feel free to carry the awesome into sunday by breaking out either of these recipes for some weekend wiles tomorrow.  or, for bonus points, why not both?  pancakes and pizza in one day?  you better believe it...

double feature, baby.  that's just how we roll.

Friday, March 18, 2011

the dessert defense

so, i have a confession.  i eat dessert.  for breakfast.  a lot.  but honestly, i've gotten to a point where i feel like it's alright, no scratch that, it's best if i let my crazy little breakfast brain have what it wants.  if i'm really in the mood for something, there's no sense in depriving myself and feeling sad and cranky about the many cakes/pastries/treats that could have been.  food is supposed to taste awesome and make you feel good.  so why not kill 2 birds with 1 stone and make an effort to eat food that does both?  it really is possible...all you need is a little creativity, quality ingredients, and some good inspiration.  a solid blender wouldn't hurt either...i'm kind of in the middle of a love affair with mine since the big purchase a few months ago.  *swoon*  but i digress.  bottom line is this: i've kind of come to realize that there's no sense in following some strict diet or weird code of eating ethic with myself that feels like punishment.  i'm driven by reward.  sweet, gooey, cakey, chocolatey, crunchy, spicy reward.  but there IS a way to treat myself sensibly so that i'm still fueling my body with the things it craves nutritionally in addition to the treats in question.  knowing that i'm doing both feels doubley good.  that's why when i wake up with some absurd craving for pudding, chocolate, dumplings, AND pie all at once, i decide what the hell?  let's give it a go.


it's a bird!  it's a plane!  it's...hmmm...a little bit of everything?

cocoa pudding stuffed dumpling pies
ohhh yeah...
makes about 2 mini dumpling pies

preheat your oven to 375 and start to make your cocoa avocado pudding:
  • 1 large ripe avocado
  • 1/2 large banana or 1 small
  • 1 T fat free cottage cheese
  • 1 ts vanilla extract
  • 1/8 to 1/4 ts stevia (start small and add more if you need it...this stuff is sweeeeet.  or you can use another sweetener if you'd like, but you may need a bit more)
  • 1 heaping T unsweetened cocoa powder
  • splash of soy (or any) milk...just enough to help with blending
  • dash of cinnamon (optional)

now you're going to have to trust me on this one.  avocado may seem like the last thing that belongs in a sweet tooth driven, chocolate laden fantasy, but it actually blends into an incredibly smooth, creamy, decadently textured neutral canvas that easily adopts other flavors.  cocoa just happens to work amazingly well.  so, now that we've overcome the fear, let's make some pudding.
throw all ingredients into a blender or food processor and blend on low or pulse until smooth.  you may have to work with it a bit to make sure it all blends.  it tends to get very thick and require a bit of assistance in my little blender, but it's nothing a little scraping of the edges and stirring to the bottom won't fix.  once it's all smooth and pudding-like, set it aside or even chill it a bit while you get your dough ready.

dumpling pie crust:

  • heaping 1/2 cup of garbanzo bean flour (or other flour if you'd like to try something else.  i just really like garbanzo bean flour for its consistency and nutrition.  i haven't made this with anything else to vouch for other outcomes, but experiment if you'd like!)
  • 2 T flaxmeal
  • 1/4 ts baking powder
  • 1/2 ts cinnamon
  • 2 T unsweetened apple sauce
  • 1 T agave or honey

mix all the ingredients together in a bowl to make a doughy mass.  you may need to add more flour if the dough seems too sticky.  you will want to be able to handle it with your hands without a lot of it goo-ing onto your fingers.  once mixed, split the dough into 2 lumps and transfer onto a small foil lined baking sheet that has been sprayed with cooking oil or lightly greased.  sprinkle each dough lump with flour to keep it from sticking to your hands, and flatten into little pancakes, being careful that they don't tear.  add more flour to the surface as needed to make it easier to work with. 

one little dumpling pie ready to set sail, and another on the way


garbanzo bean flour tends to be rather fragile since it's such a fine powder, but produces a really yummy, creamy consistency with baked goods.  you could try this with other flours if you'd like.  it may be a bit easier to work with and may not require so much care, but will most likely come out with a completely different sort of consistency.  i happen to love garbanzo bean flour, but it can be tricky to work with if you're not used to it.
after you've made your little pancakes, it's time to add your filling.  spoon about 2 T of pudding into the center of each pancake, leaving a good amount of the pancake edge to work with.  you want to be sure you don't have too much filling, since you'll have to wrap it all up in a second.


you'll have about half of your pudding left.  you can either cover it and save it in the fridge for later, double the batch amount for the dumpling dough and make more pastries with it, or eat it right away.  i may or may not have lightly considered the first two options only to fully commit to the third.  ahem.
next, start to carefully bring the edges of the pancake up and over the pudding, pinching together at the top to make your little dumplings.  spray the tops lightly with cooking spray and sprinkle with cinnamon.

choco pudding vessel all locked and loaded!


put them in the oven on the middle rack and bake for 12 minutes or so...until the crust has started to brown and crisp a bit at the peaks.  top with a drizzle of agave, maple syrup, or honey, a little cinnamon, some fruit and relish in the fact that each one of these delicious little pudding pockets has about as much protein as a single serving of lean turkey breast, 12 g of fiber (that's nearly half your RDA) with under 275 calories.  not so shabby, eh?


who says health food sucks? 

Thursday, March 17, 2011

in praise of pumpkin

i love pumpkin.  it's creamy, sweet, colorful, satisfying.  it's distinctive flavor always reminds me of the holidays, making it an instant comfort food despite its crazy amount of health benefits.  this stuff is awesome.  it's rich in vitamin c, vitamin e, high in fiber and in just a single one cup serving of pumpkin, you're fueling your body with over 245% of your RDA of the antioxidant vitamin a and you're doing it in under 50 calories.  pretty neat, huh?  pumpkin is a staple item on my grocery list each week and for one really good reason.  i mean, yeah all this health stuff is great and all, but first and foremost...it's just plain super tasty.  and um, versatile?

crunchy spicy

warm and be-streuseled

rich and creamy


as you can see, i generally tend to stay on the sweeter side with a lot of my pumpkin eats, but pumpkin definitely isn't limited to those of us with a sweet tooth.  pumpkin can be used to make all kinds of awesome soups, sauces, stews, breads, roasts, and more in addition to all the yummy puddings, pies, pastries, and desserty treats.  but, for the sake of consistency (and because this is what i actually ate this morning) i'm going to keep this post light and sweet and let you know all about the delight that is this microwave (yes, really) pumpkin cakebread:

oh so dreamy...


it beckons!!


this was nothing short of amazing.  the consistency is moist and dense like a holiday dessert bread with just enough sweetness to make you think of a little cake, but not overwhelm you like eating a whole one probably would.  it's incredibly satisfying.  i was full for hours after eating this little guy.  also, super healthy, gluten free (if that's a concern of yours), and has the option of being vegan as well.  plus, it's absurdly easy.  just 10 minutes or so buys you a friggin cake.  for breakfast.  just for you.  sweet, right?
so, having made and loved ashley's incredible microwave cocoa buckwheat bakes several times in the past, i was really inspired to create my own version of these with a slightly different flavor.  enter the pumpkin.


breakfast pumpkin cakebread


makes one cakebread serving (how personal!)


wet ingredients:
  • about 1/4 cup unsweetened 100% pumpkin puree
  • 3 T soy (or any) milk
  • 1 T agave or honey
  • 1 egg white (or you can sub a flaxegg for a vegan cake: 1 T flaxmeal mixed with 2 1/2 T water and allowed to sit for 5 minutes)
  • 1 1/2 t vanilla extract 
dry ingredients:
  • 1/4 cup ground raw buckwheat flour (i just grind my raw, untoasted groats in my coffee grinder till powdery)
  • 1 T raw buckwheat groats
  • 2 ts flaxmeal
  • 1 T rolled oats or quick oats
  • 1/2 to 3/4 ts cinnamon 
  • dash of nutmeg
  • dash of fenugreek (optional)
  • 1/4 ts baking powder
  • 1/4 ts stevia
  • around 1 T raisins (more or less if you'd like)
  • crushed walnuts (optional)


mix all the wet ingredients together in a bowl with a fork. once combined, start adding each dry ingredient one at a time to ensure thorough mixing. scrape the batter into a greased microwave safe bowl/dish/container (i just used a little cooking spray on a 2 1/2 cup tupperware container) and cover with a paper towel. microwave for 2 to 2 1/2 minutes. eat it right out of the dish you cooked it in, or for fun, you can flip it over into a plate for a free standing cake. i love being able to make different shapes this way. sure, they're usually just squares or circles since my tupperware is all boring, but the kid in me is still impressed every time i manage to flip a perfectly tupperware-shaped-cake onto my breakfast plate in no time at all.

for this round, i kept it simple and just smoothed a little bit of low fat cream cheese on my cake with a little drizzle of agave, some cinnamon and strawberries, but this would also be amazing with melty peanut butter, cashew cream, maple syrup, or one of my current fav creations: peanut butter yogurt icing (1/4 banana mashed up with 1 ts or so of peanut butter, melted in the microwave and mashed in with a T or so of greek yogurt with a little cinnamon and/or stevia if you'd like. mmm warm and creamy fluff). play around with it and see what you like! cake for breakfast! for real! martha stewart doesn't even KNOW how good a thing this is. bam!

Wednesday, March 16, 2011

sasquash sighting!

Alright, kids!  first official post on what's kind of just been a phantom idea of mine for the past several weeks.  i finally decided to just up and get this baby started.  less talk, more...uh..talk...in blog form.  so anyway, seeing as this had become such a figment of sorts for so long, i figured it might be appropriate to kick things off with a culinary cryptozoological sighting.  ladies and gentlemen, i give you, mandarin spaghetti sasquash stew!


so, originally i had planned on a much lighter, less stew-y version of this meal, but this things was kind of a beast from the start...and the end result was still pretty darn tasty, so i'm completely satisfied to take my gains with my losses.  this was my first time cooking a spaghetti squash and i was hoping for something a little more strand-like in consistency rather than the creamy mash i ended up with.  i may have roasted mine a bit too long or stirred it in with the sauce a bit too...enthusiastically.  but in any event, this became a really nice, hearty soup instead that satisfied both a sweet and savory craving and really hit the spot.  left overs, too!  bonus!

you will need:
1 spaghetti squash
2 mandarin oranges
1 small to medium onion cut into chunks
3 smallish plum tomatoes cut into large chunks
2 handfuls of spinach
2 ts garlic powder
1/4 ts nutmeg
1 3/4 ts cinnamon
1 ts basil
3 TS nutritional yeast (optional)
salt to taste

preheat your oven to 375.  cut your squash in half lengthwise with a trustworthy, large knife.  these suckers are tough and kind of awkward, so be extra careful and take your time.  i had to wrestle with mine for a bit...just keep reminding yourself that it's as afraid of you as you are of it.  after muscling it to submission, scoop out all the seeds and stringy middle bits with a spoon and discard.  lightly coat or spray the cut/fleshy side with cooking oil or spray and place it face down on a foil lined bake sheet or tray with about 1/4-1/2 cup of water to keep it from drying out.  cook on the middle rack for about 20 minutes.  in the mean time, peel your mandarins and cut them into wheel slices like so:


once squash hits the 20 minute mark, pull it out of the oven, flip that puppy over, and cover the flat fleshy side with the orange slices.  pop it back in the oven for about 15 minutes or until the flesh easily peels away from the skin with a fork.  pull the squash out of the oven and let it sit while you get the rest of the stew cooking.

heat up a little olive oil in a pot and throw in the onion.  cook until starting to turn translucent and add tomato and spices.  cook until tomatoes start to soften and add the spinach and the spaghetti squash strings along with the mandarin slices.  stir it until it's combined and let it all kind of simmer together until the temp and flavor is consistent.  you can adjust the spices how you'd like them, but i found the sweet spice and simple but distinctive savory blend in this really appealing.  the nutritional yeast adds a nice little bit of nutty/cheesy flavor, too....if you're into that.
i topped mine with fresh basil, walnuts and cranberries and that was pretty swell, but feta and raisins or a little cheddar with a side of brown rice or quinoa would all be really good with this, too.  i also made mine vegan just cause, but you could easily throw some turkey or chicken in with this for a heartier, meatier meal.  enjoy!  and thanks for reading my first post!  lots more fun stuff to come :)